Design of a Pedestrian Truss Bridge for Downtown Toronto
Time frame: October-November, 2016
Project type: Team
My responsibilities: Site visit, truss design, loading analysis, engineering drawings
Our first foray into Engineering Design practice, this project gave us the chance to test our knowledge of basic Civil Engineering theory, while also considering some of the real-life challenges that come with design (such as aesthetics, geographical requirements, etc). It was also my first time working in a group with other student engineers, and as such was an invaluable experience where I learned the importance of dividing up work and specializing to ensure that the project was done to the highest quality possible, within the two-week time limit.
Before beginning the redesign of our selected pedestrian bridge, we first made a site visit to get an understanding for key elements we would have to consider. Pictures and measurements were taken (with out best effort not to disturb the users of the bridge). This served as our analysis and exploration of the project, gathering as much situational evidence as we could that extended beyond the requirements given in the assignment.
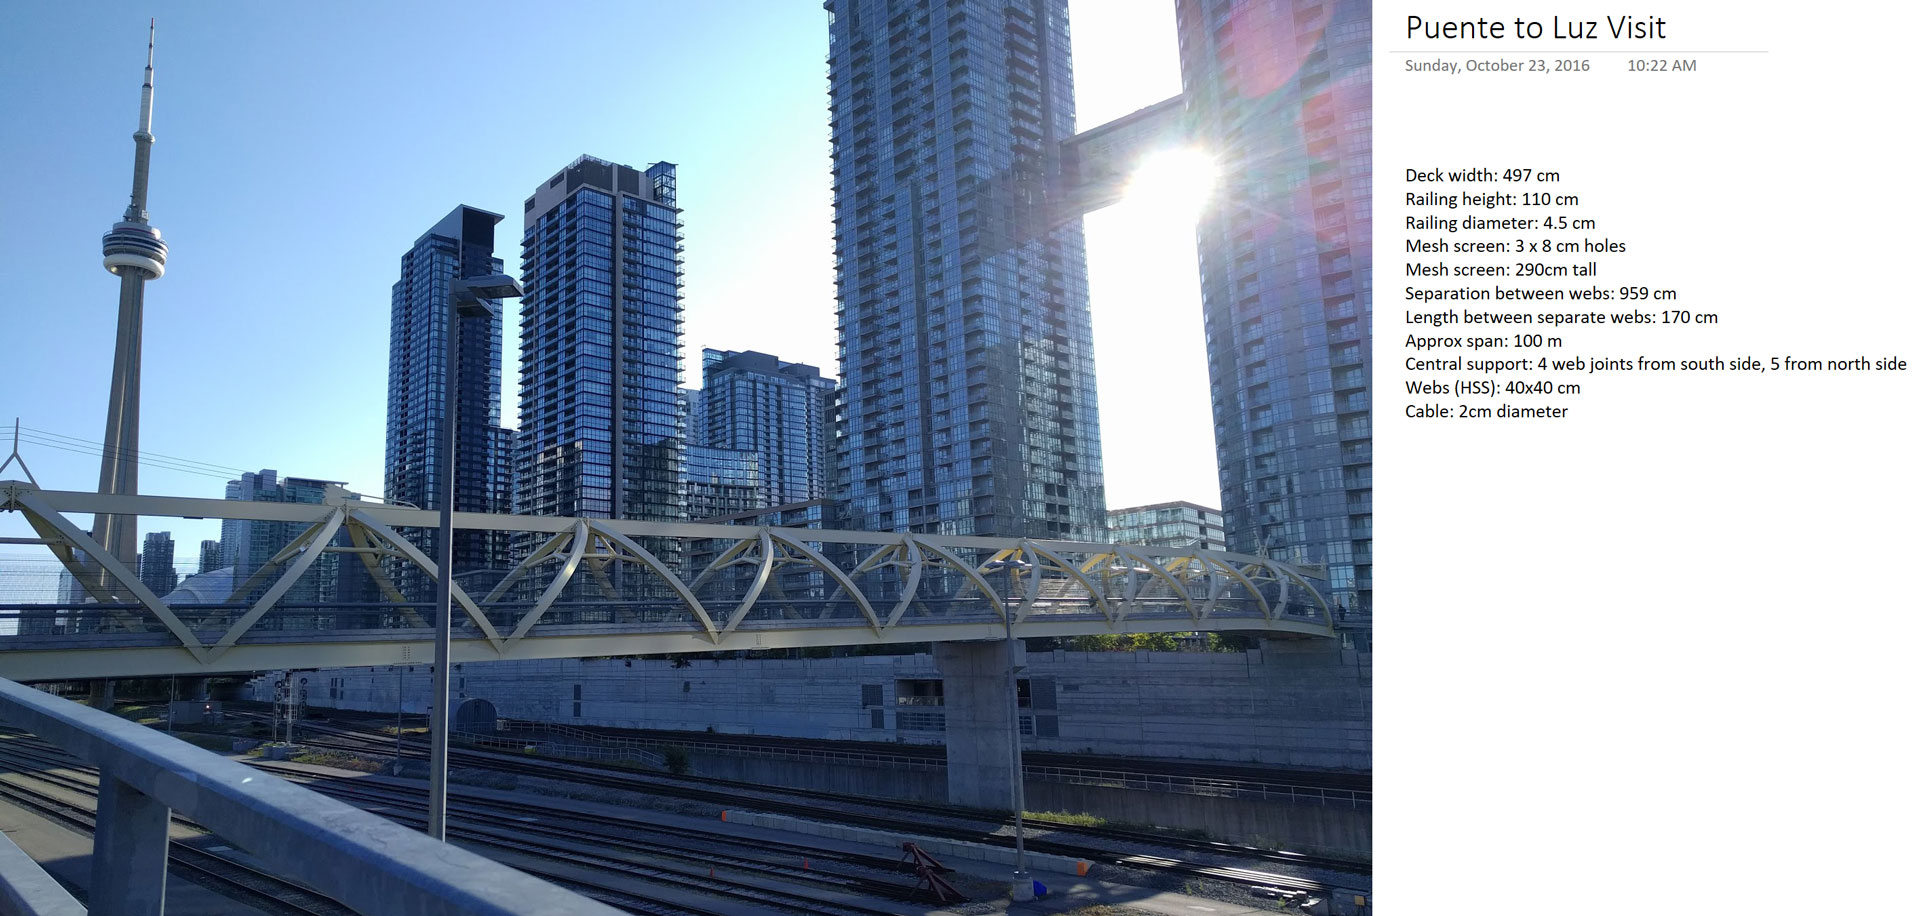
Figure 1: A photo from our first site visit and accompanying notes, capturing key features including positioning of center support and non-level bridge deck.
After gaining a good understanding of the overarching and situational requirements our design would have to conform to, our team began the design. After choosing a symmetrical Pratt truss-style bridge, we chose dimensions that would fit with the site measurements we had taken. My responsibility was then to perform the loading analysis on the beams in the truss, allowing us to then pick appropriate steel beams for construction that would safely support our predicted dead and live-loads, with a factor of safety of at least 2x.

Figure 2: The engineering drawings for the proposed elevation and plan of our bridge.
Lessons learned
As this was my first opportunity to practice Engineering design, I gained valuable experience both in the discipline of Civil Engineering and in building towards my own Engineering design process. This project contributed greatly towards the first phase of my design process, specifically in learning to identify requirements of the design and perform independent research. Had we not conducted our own site visit and taken detailed measurements, we would not have properly identified the non-symmetrical layout of the bridge, and thus would have designed a bridge incompatible with the site we were supposed to be designing it for. This insight has played an important role in all of my subsequent design projects.
Design and Construction of a Matboard Box Girder Bridge
Time frame: November, 2016
Project type: Team
My responsibilities: Loading analysis, material optimization, construction
Having learned significantly more material by this point in CIV102, this project had a larger theoretical aspect to it, as well as the need to actually construct what we designed. This time, all of our calculations were done in 1:1 with what we were building; we were designing a box-girder bridge 1016 mm in length that was to support a 900 N train (~200 lbs). Designing the bridge in itself wouldn't have been a difficult task, except for the fact that we were constrained to using a maximum of 0.8 square meters of matboard and 60 mL of contact cement. As we were making the design, which included choosing heights, thicknesses, and placement of diaphragms to maximize the load it could carry, I was laying out the pieces on a 1:1 scale drawing of our matboard sheet in Adobe Illustrator.
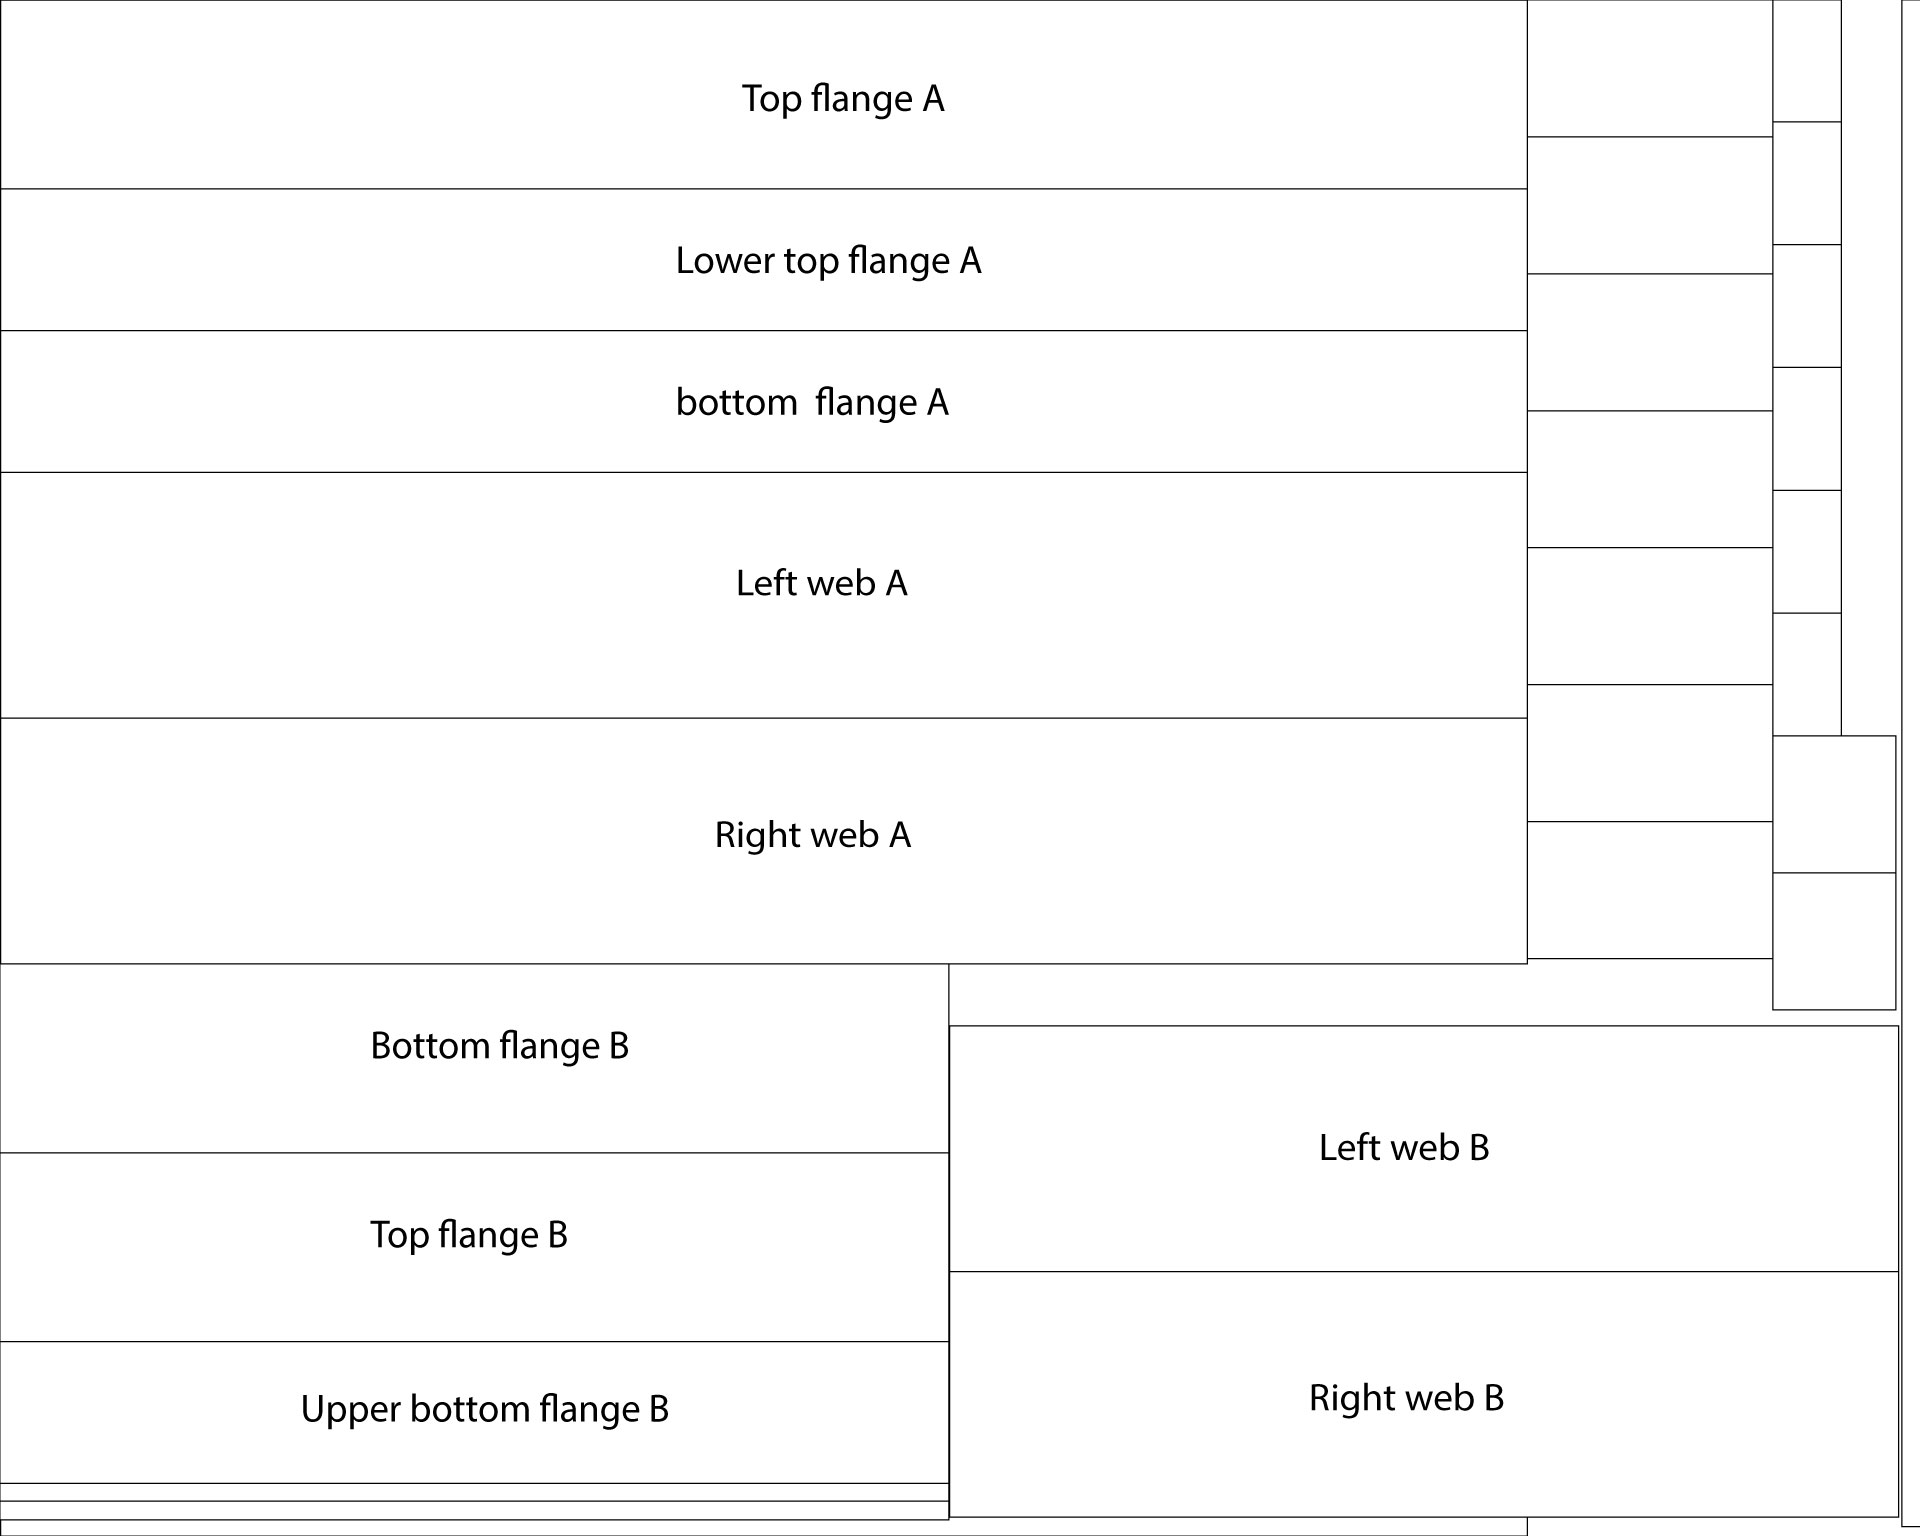
Figure 3: The final layout made in Adobe Illustrator of how we would cut the matboard. Sizes in Illustrator were done exactly, so I cross-referenced rectangle dimensions on the computer as we traced them onto the board before cutting.
Once the design was finalized and the matboard laid-out, we embarked on the journey of constructing the bridge. Though not in hindsight a wise move, construction of the bridge took place over the only all-nighter I pulled in first year. This wasn't by necessity for leaving it too late, we simply didn't want to quit and leave our bridge once we started building it. Time estimates were also far off from reality, and construction grew from taking "only 3 hours", to taking about 14. To make the process easier on ourselves, we had measured each piece twice, cut them out, and labelled them so we knew exactly where on the rather complicated bridge they would have to go. The optimization of our matboard was near-perfect, and we were left with only a sliver of the material once we were done.
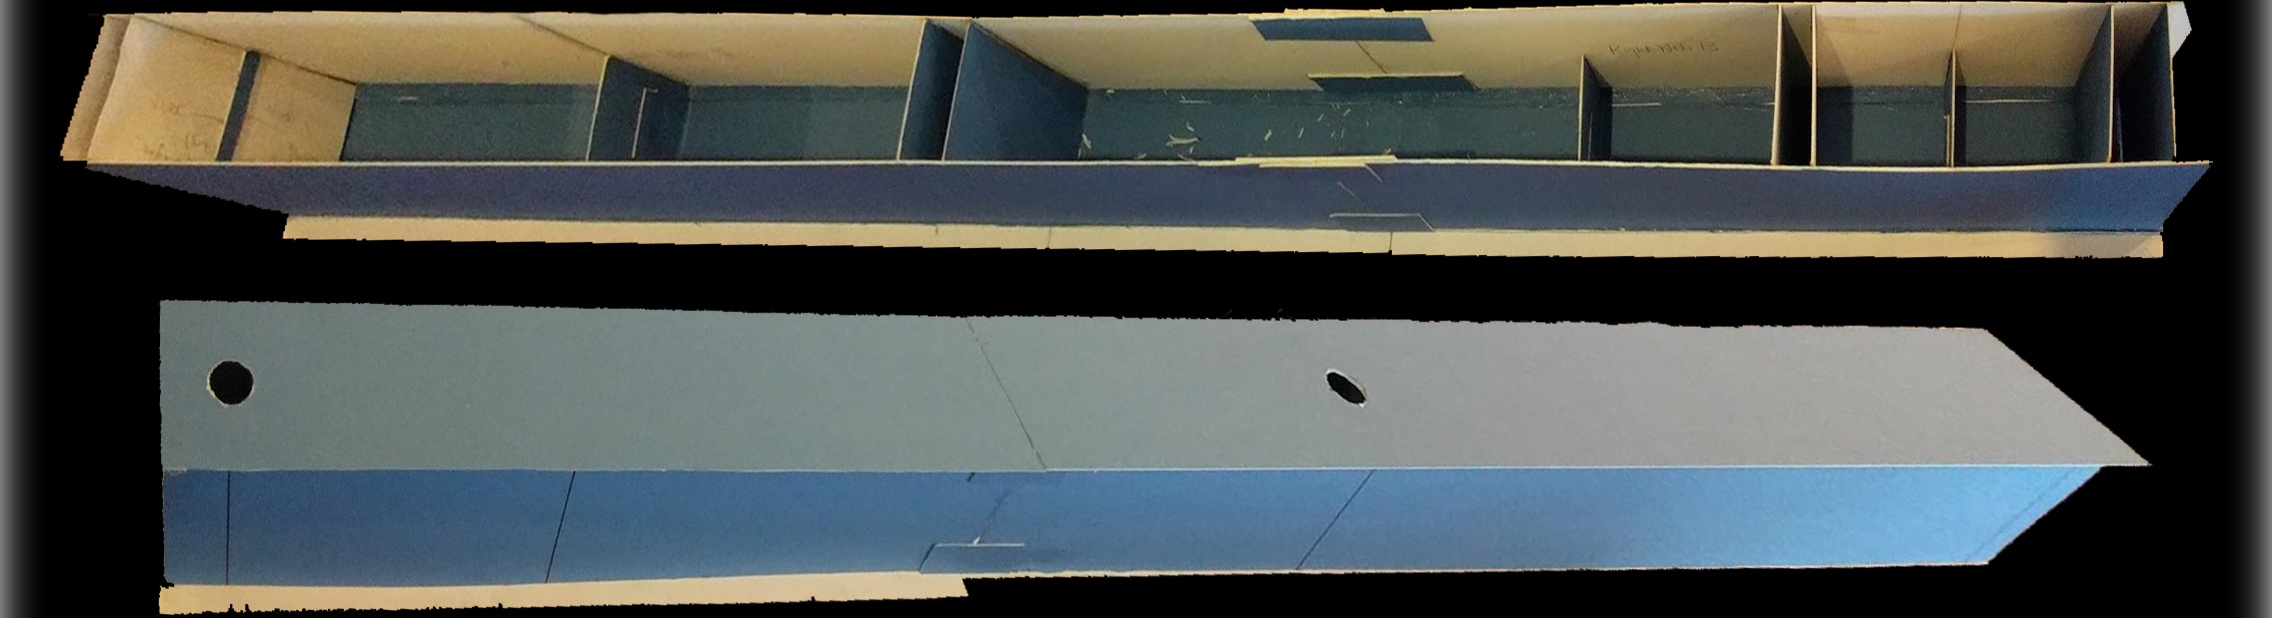
Figure 4: Bottom and top views of our completed Matboard box girder bridge
Lessons Learned
My first time going through the full process of designing then building helped me to realize the importance of prototyping designs early. We were limited in the Matboard available to us, however it would have been wise to obtain some of our own for testing purposes. Going into the build, we didn't realize that after applying the contact cement, we needed to let it cure for about 20 minutes before attaching the pieces together, after which we had to hold them for another 10 minutes (and wait another 24 hours until it was really cured). This was once of the major contributors to our late-night-into-early-morning building, and could have been identified with some practice and prototyping. In addition, we learned that triple-checking your work is of critical importance. As mentioned before, our bridge was non-symmetrical. Because of this, our bridge was divided into two spans with different cross sections. In simple terms, one segment was supposed to have two layers of Matboard on the top and one on the bottom while the other segment was the opposite, to maximize the load the bridge we could take. In our early excitement to start building, we neglected this key feature (by putting double layers on the tops of both spans), significantly reducing the performance of our bridge. Measure twice, check three times, glue once.